LabVIEW hardware interfacing and integration
With NI hardware or non-NI hardware
LabVIEW is a dominant development platform for all types of automated measurements and control. Developers of automated systems, such as test systems, need to interface with hardware. Examples range from basic digitizing of analog values to controlling a telescope. With the huge array of hardware options, you may be wondering if LabVIEW can interface to absolutely any type of hardware. This article reviews why LabVIEW is such a good development platform for hardware interfacing, based on our decades of using LabVIEW in a wide range of test systems.
In this article we’ll go over:
- Common use cases for interfacing / integrating LabVIEW with hardware
- Tips for interfacing / integrating with hardware
- Lessons learned / gotchas when interfacing / integrating with hardware
- Next steps if you’re looking for help
Common use cases – why do people interface LabVIEW with hardware?
There are two main reasons for using LabVIEW to interface with hardware.
- LabVIEW natively supports so many types of hardware from NI and is designed to support hardware made by other vendors. In fact, most vendors offer LabVIEW drivers with their hardware since LabVIEW is so commonly used.
- Many systems (e.g., automated test, industrial embedded) need to interface with the real world by taking measurements, controlling actuators, or communicating with other hardware.
No single supplier of hardware for measurement and/or control can satisfy all needs. You may have:
- unique data acquisition sample rate needs,
- schedule or budget constraints that require effective implementation,
- uncommon measurement needs,
- or unique sensor types.
LabVIEW offers an open and flexible development platform to handle all these scenarios.

Tips for interfacing LabVIEW with hardware
LabVIEW works natively with hardware offered by NI, mainly through the DAQmx drivers or, if you’re using NI’s CompactRIO hardware, through the additional methods of Scan Mode and FPGA nodes. This support is the primary reason that most LabVIEW developers choose NI hardware: it’s just easier to use.
The rest of this section discusses using LabVIEW with non-NI hardware.
LabVIEW drivers
The first step you should take will be to check if the hardware vendor has LabVIEW drivers for the instrument you need.
It’s rare to find a vendor that doesn’t have LabVIEW drivers.
If a driver is available, we recommend that you check that the driver supports the functionality you need in the application you’re developing.
For example, some drivers offered by vendors don’t work well if you have several of the same instrument in one system. Or the driver might be slower to respond than you’d like. In these cases, you might be able rework the example code offered by the vendor to make it do what you want, or you may have to write your own driver.
Hardware interface connection schemes
Review the connection scheme. Almost all instruments support an interface using messages sent over a communications protocol.
Common protocols (in no particular order) include:
- GPIB: a solid standard still in use, but being replaced with Ethernet
- RS-232 serial: a persistent standard even though it’s low-level and somewhat finicky to set up
- Ethernet: very capable, but connect such instruments only to your PC or controller to avoid IT concerns about hanging an unknown device off the corporate network
- USB: also capable and easy to setup, but may not be as reliable as Ethernet
Note that the VISA standard supports many of these protocols.
If the vendor doesn’t have a LabVIEW driver, you’ll need to learn the interface for the instrument for commands sent to, and responses sent by, the device. You may be surprised by the huge extent and intricacies of the entirety of the messages and their formatting needs. Drivers for some non-NI instruments are not at all trivial, e.g., the 160+ pages of commands for a Keysight signal analyzer.
Best methods to interface LabVIEW with instruments
The best method to consider when interfacing LabVIEW to instruments is VISA, which is a common abstracted bus interface for instruments. VISA supports many bus protocols such as GPIB, USB, and Ethernet communications.
If the instrument does not have a VISA driver for LabVIEW, you can still interface to the device using direct calls for whichever protocol the instrument supports. For example, if the instrument supports Ethernet, you’d open an Ethernet port and read/write messages to the IP address of the device.
Interfacing LabVIEW with custom hardware
The need to develop a driver for custom hardware is rare and specialized. The effort depends heavily on what the custom hardware does and how communication is handled.
There are 3 approaches worth considering:
- First, the custom hardware might be controlled and monitored via analog or digital signals, which would be handled by an appropriate NI card(s) via the DAQmx driver.
- The next level of complexity would be a device with communication to LabVIEW via RS-232, Ethernet, and so on. Then you could use LabVIEW’s tools (e.g., VISA) to talk with the device.
- Finally, a plug-in PXI card in a chassis with a Windows-based controller. This would require significant software development for the operating system (OS): first just to recognize the card so that the OS would recognize it, and then second, low-level drivers that follow the development needs of the driver model so that LabVIEW could talk to it.
Alternatives to LabVIEW for hardware interfacing
LabVIEW has a much more robust and developed set of tools and a development environment than other languages, especially for NI hardware.
However, both Python and C# (and by extension C and C++), and other languages too, have ways to interface with just about any type of hardware. For example, NI offers Python wrappers for DAQmx to support their hardware. For non-NI hardware, you may be able to find drivers or wrappers for your preferred development language or you would drop back to using low-level calls or communications protocols and building up your driver from scratch.
Lessons learned & gotchas to look out for when interfacing hardware with LabVIEW
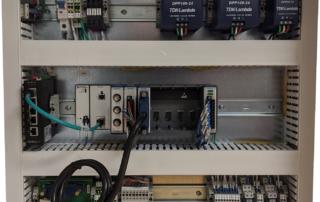
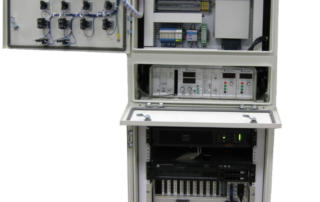
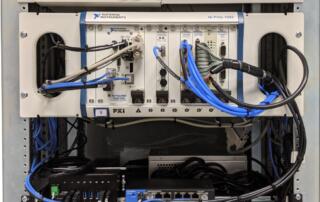
At Viewpoint, we’ve interfaced to countless pieces of hardware over decades, most from NI, but many times from other vendors due to the wide range of test systems we’ve developed and delivered to customers with incredibly diverse measurement and control needs.
Some of the more impactful gotchas to keep in mind when interfacing LabVIEW with hardware are:
- Using the hardware in ways that are incompatible with the desired measurements or control.
- Using hardware outside of its specs.
- Underestimating the development time.
- Forgetting to save and restore the instrument configuration.
Some details regarding each of these:
Using the hardware in ways that are incompatible with the desired measurements or control
- Doing single point updates/reads when buffered I/O is needed to keep up with the desired rate.
- Incorrect configuration of synchronization across I/O channels.
- Acquiring/outputting more data than can be handled by the PC/controller.
- An example of a nitpicky but head-scratching detail is the mixing Delta Sigma (DS) and successive approximation (SA) A/Ds. Since DS converters delay their output relative to SA, skews in signal timing appear.
Using hardware outside of its specs
- Unattainable sample/update rates, whether too slow, fast or between allowable rates.
- Out of range or under range inputs can lead to acquired signals that are clipped, or so low in amplitude that only a few of the quantized bits are utilized.
- Out of range outputs can result in non-functioning actuation. Perhaps the more prevalent issue in this item is driving a digital output from the hardware into a unit under test (UUT) that expects more current than the hardware can provide. We’ve seen this issue with some of our customers trying to use an analog output to control a relay, but it can also happen with digital outputs. Also, too much current or too high a voltage can destroy the UUT.
Underestimating the development time
- If the driver exists: the time needed to learn and utilize the driver can be much more than initially expected; some vendor drivers are complicated.
- If the driver doesn’t exist: the time needed to learn the instrument‘s interface and develop a driver can be daunting.
Forgetting to save and restore the instrument configuration
- If the instrument resets after a power cycle, the configuration might return to factory setting, rather than what you expected to make your measurements for your test.
- If the instrument configuration is changed by another application or by pressing some manual buttons or menu items, the instrument needs to be returned to the configuration you expect before your test proceeds.
Next Steps
If you’re trying to select test hardware and feeling overwhelmed by NI’s massive catalog of hardware options, check out our NI Hardware Selection Services.
If you’re in learning mode, here’s some info that you might find useful:
- NI Hardware Compatibility – real-world tips and lessons learned
- What should I keep in mind when I’m launching a new product and considering a custom manufacturing test system?
- What should I keep in mind when I’m launching a new product and considering a custom product validation system?
- Using LabVIEW for automated testing
- Tips for improving manufacturing test with advanced test reports
- Tips for improving design validation with advanced test reports
- How to improve a manual testing process
- Hardware testing process – How to test products during production
- Design validation testing with LabVIEW
- Hardware test plan for complex or mission-critical products
- Product testing methods for industrial hardware products
- Which NI platform best fits my automated test needs? cRIO, PXI, cDAQ?
- Instrument Control with LabVIEW
- How to prepare for when your test team starts to retire
- Practical manufacturing test and assembly improvements with I4.0 digitalization
- What to do with your manufacturing test data after you collect it
- 5 Keys to Upgrading Obsolete Manufacturing Test Systems
- How Aerospace and Defense Manufacturers Can Make the Assembly and Test Process a Competitive Advantage
- 9 Considerations Before you Outsource your Custom Test Equipment Development
- Reduce Manufacturing Costs Report
- Improving Manufacturing Test Stations – Test Systems as Lean Manufacturing Enablers To Reduce Errors & Waste