How to Diagnose Failing Custom Test Equipment
- Process to diagnose failing custom test equipment
- Likely causes of failure
- Thoughts on getting started
Scenario
You’ve got a piece of custom test equipment that was developed months or years ago (like maybe even like 10 or 20 years ago!).
It’s been working just fine in your lab or on the production floor, until one day you go to use it (or someone comes up to you with their hair on fire (not literally of course)), and it’s not working. Maybe it errors out entirely, produces erroneous results, or intermittently fails in some way. Now your hair is on fire!
You need to diagnose the problem and get the tester back up and running.
If you don’t want to diagnose or fix the test equipment yourself, and you work for a US-based manufacturer or lab, you can reach out here for help.
Do you already have a pretty good idea that you’ve got an obsolete test system that needs to be updated? If so, check Replacing Obsolete Test Systems and reach out here if you want us to update it for you.
Process to diagnose failing custom test equipment
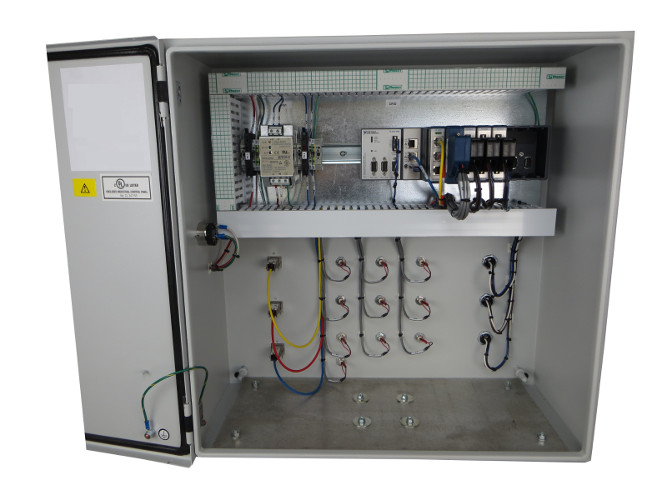
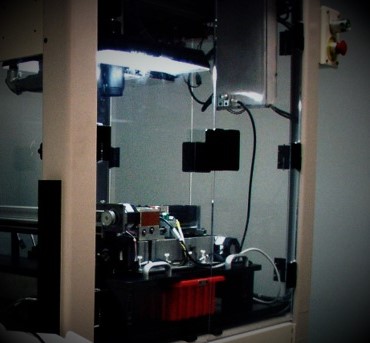
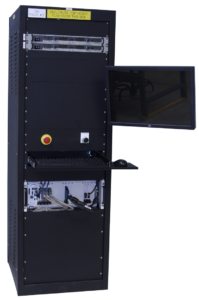
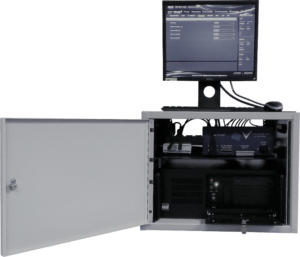
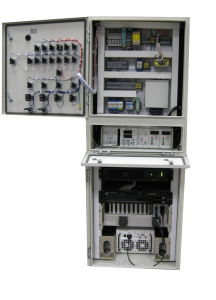
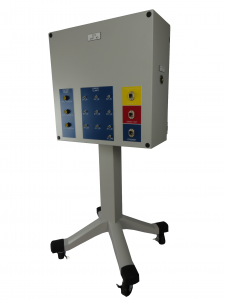
You’ve got a piece of test equipment. In reality, it’ll take many forms. Maybe it looks like one of these, or maybe something else entirely.
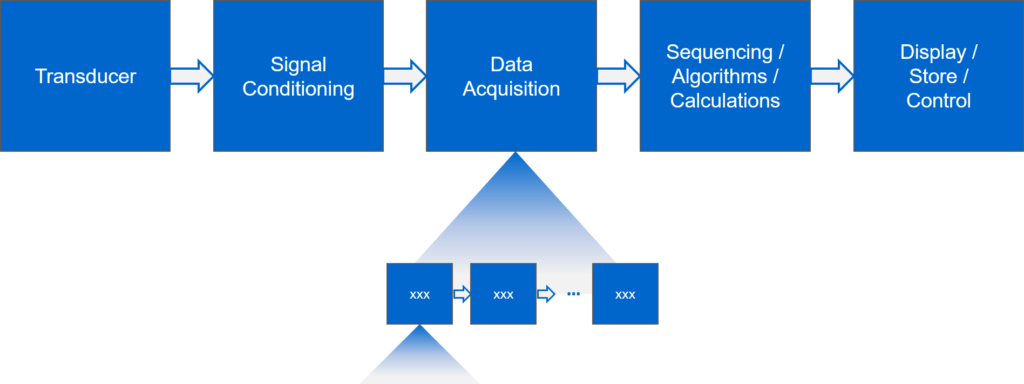
In block diagram form, it likely looks something like this:
The process you want to follow typically looks like this:
- Isolate and separate
- Simplify the input stimulus as much as possible
- Observe the output
- Iterate to zero in on the failure
Isolate and separate
You’re usually observing a symptom, not the root problem itself directly. Look for clues that point you toward a general region of the problem. It’s okay to be wrong. You’ll get better at this with experience.
From there, divide and conquer. In other words, select intermediate input and output locations to separate the system and create your own little (temporary) subsystem. Note these need to be locations that you’re able to stimulate and observe.
Simplify the input stimulus as much as possible
Your custom test equipment may be working with dynamic, complex, and sometimes noisy signals. We want to simplify the problem to diagnose and find the root cause. So we want to simplify the input stimulus as much as possible (as much as possible means just complex enough that the failure activates). What that means is dependent on what you’re trying to stimulate, but some ideas will include stimulus such as:
- Constant/static input voltage away from the noise floor.
- Sinusoids or other alternating analog waveforms which result in known outputs
- Counting patterns
- Noise-free digital inputs
- Walking ones
Remember to keep in mind as you’re injecting new stimulus, you don’t want to damage the system further, so keep in mind maximum allowable input levels, be careful not to short circuit something, etc.
Observe the output
This aspect can range from super-easy to pretty involved, depending on how hard it is to access/probe the intermediate output (physically, electrically, or digitally), as well as whether or not you need to be able to trigger the capture of the output based on the timing of the input.
Iterate to zero in on the failure
At this point one of two things have likely occurred:
Option 1: You were able to replicate the problem within the temporary sub-system you created. If this occurs, either you’ve narrowed the problem down as far as you need to, or if there are still several components in play, repeat the process starting at the isolate and separate step to continue to narrow down and locate the failure.
Option 2: You weren’t able to replicate the problem within the temporary sub-system you created. If this is the case, there’s several reasons that could be the case. The most likely reasons are:
- You didn’t activate the failure.
- The failure exists outside of the temporary subsystem you created.
- You weren’t able to observe the intermediate output correctly.
There are several things you can try here. You can:
- Try modifying the stimulus.
- Try changing the location of your temporary inputs and/or outputs.
- Make sure you’re set up to observe the output well.
- Pull in another engineer that’s not close to the problem but has a lot of experience to bounce your ideas off of and get a fresh set of eyes on it.
A word about repeatability of the failure
If the initial symptom/problem can be replicated consistently, be thankful. Some failures occur very infrequently. The first step is to be able to reproduce the problem.

A few things to consider if you can’t re-produce the problem off the bat:
- Replicate the stimulus and environmental conditions as closely as possible. Is the input the same? Is the temperature the same?
- Stress the test system a bit. Sometimes operating the test system at its limits can encourage an intermittent failure to occur more frequently.
- Consider adding some detailed error/diagnostics logging functionality to the code. The caution flag here is that since you’re changing the overall code base, you might actually make a problem less likely to occur because you subtly changed the timing. You’re also invalidating your released code, so make sure to branch off the released main line before making changes.
Most likely causes of the custom test equipment failure
- Power
- Connections
- Hardware component failure
- Configuration change
- Calibration out of date
Less likely causes of the custom test equipment failure
- Software changes due to upgrades (typically those which you did not request). Note that software doesn’t change by itself.
- Network or file store changes
- Data storage capacities are exceeded.
Some thoughts to get your diagnosis started
Power
Silly as it might seem, check that the power supply (or supplies) are functioning. Power or power connections are often overlooked because people just expect them to work.
Connections
Verify that cables and harnesses are all connected properly and aren’t damaged. Like the power supply verification, it’s good to check the basic things first. For example, perhaps the sensor mounting has loosened. Or maybe someone disconnected or mangled your ethernet cable.
Moving parts
Verify that all the moving parts are still moving or are movable. Moving parts wear out, of course, so your measurements may be wrong because a mechanical component is nonfunctional. For example, the motor might not be spinning as freely as it should and you can’t apply the proper torque. Perhaps a shaft coupler is slipping or broken.
Fans and filters
Don’t forget to check fans and their filters in your PC, UPS, or other electronic components that might have fans. Without fans, electronics can overheat and act unexpectedly or be damaged to the point that they don’t work at all.
DAQ (Data Acquisition hardware)
- Disconnect the data acquisition system from the analog source (e.g., sensor) and measure the analog channel of interest by injecting a known voltage to verify that the DAQ results is as expected.
- If the DAQ channel checks out, then it’s time to start looking for a bad transducer or cabling. If a cable is repeatedly connected/disconnected from a UUT, check for mechanical breakage or misalignment of connector pins or wire breakage.
- If the transducers are driven by excitation from the test system, it would also be good to verify that the excitation is correct.
Standalone instrumentation
If you’re using standalone devices such as a DMM, spectrum analyzer, oscilloscope, etc, check input signal connections, power, and the communication connection. Since the device is standalone, you can often disconnect it from the rest of the test system to perform a very encapsulated evaluation of the device. Often these devices have self-check routines useful for diagnosis.
Next Steps
If you diagnose successfully and are able to get your test equipment back up and running, congrats! If diagnosing your failing test equipment is becoming too common of an occurrence and you want to update your obsolete test equipment, reach out here for a discussion.
If you were just reading this info to get ahead of the game for future problems, here’s some other resources that may catch your interest while you’re in learning mode:
- LabVIEW Test Automation – Custom Automated Test System Buyers Guide
- Hardware Product Testing Strategy – for complex or mission-critical parts & systems
- Commissioning Custom Test Equipment – Viewpoint Systems
- How to prepare for when your test team starts to retire
- Practical manufacturing test and assembly improvements with I4.0 digitalization
- What to do with your manufacturing test data after you collect it
- 5 Keys to Upgrading Obsolete Manufacturing Test Systems
- How Aerospace and Defense Manufacturers Can Make the Assembly and Test Process a Competitive Advantage
- 9 Considerations Before you Outsource your Custom Test Equipment Development
- Reduce Manufacturing Costs Report
- Improving Manufacturing Test Stations – Test Systems as Lean Manufacturing Enablers To Reduce Errors & Waste