
Some Tips to Speed Up Industrial Embedded Product Development
This post will focus on the Development stage of an industrial embedded system.
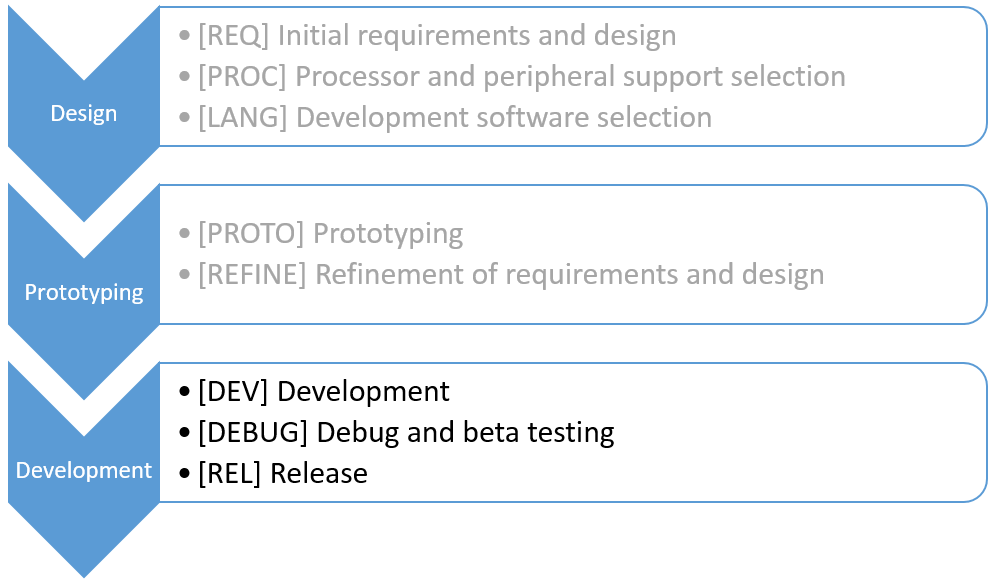
Recall from the initial introductory post on the topic of improving Time to Market, I introduced three stages in a typical product development process: Design, Prototyping, and Development.
This post will focus on the Development stage of an industrial embedded system.
I broke down this Development stage into two major components. See the chart below for reference to all the stages. Two stages are grayed out to highlight the one covered by this post.
Setup
Recall from a prior post, about the Design stage, that the hypothetical company already has a product out in the market that needs to be upgraded. The product is electromechanical in nature (it interfaces to stuff like valves, motors, sensors, …). About a couple 100 of these units are sold per year.
Also, remember that this series of blog posts has been discussing these stages relative to comparing various hardware and software platforms. Since we are going to replace the existing obsolete controller, I’m considering 3 approaches to replace this old controller.
The first approach starts with a completely COTS hardware approach and ends with a custom hardware (single board) solution. The second approach starts with completely custom (single board) solution and uses that hardware through the whole product development cycle. Finally, the third approach starts with a COTS controller and combines that controller with both COTS and, if needed, custom I/O hardware. I label this approach as “Hybrid” since it considers both COTS and custom hardware.
IMPORTANT CHANGE OF PLANS: Note that in prior posts, I’ve only compared the Hybrid approach with a sort of merged COTS & Custom approach. But, while writing this post, it became clear to me that I really needed to differentiate the purely COTS and Custom approaches since they are so different when comparing the amount of time each spends in the PROTO and DEV steps. So, I’ve expanded the comparison bar chart below to make these differences clearer by reviewing 3 distinct approaches.
You might remember from the design post that options for this hybrid approach are many. Back in that earlier post, I recommended that you look for a platform that uses components close to the same physical form of your end goal. One example is the PC/104 standard. Utilized for decades (i.e., since 1992), it has now evolved to support the PCIe bus. Another option worthy of consideration is the VERDI platform, based on the NI SoM RIO controller and several pre-developed I/O hardware modules. Finally, on the low end, the Raspberry Pi and Beagle Boards offer some pretty amazing capability for a very low price – the downside being that this hardware is not as industrially robust as the others (e.g., the BeagleBone and RasPi have no heat spreader whereas the NI SoM RIO does).
OK, now that I’ve done this “overview”, let’s talk about the Development stage.
Development
After completing the Prototyping stage, the Development stage picks up after the hardware and software designs for this updated product have been vetted and the team is ready to begin creating the actual product. The Development stage contains the DEV and DEBUG steps which are intended to assure that the product is functioning as desired and doing so robustly. Also, very importantly, this stage includes the REL step for assuring that the product documentation is completed and archived and the product is ready for manufacturing. This REL step is boring but saves you from the embarrassment and frustration when you need to make a revision in the future and can’t find the layout files! Such a simple step but so important too.
Check out the bar chart below. The biggest point I want to make in this chart (and the reason I explicitly describe the 3 hardware approaches) is the inherent tradeoff between prototyping and development. Specifically, when the hardware used to prototype is different than used to develop, a lot of time is spent in either PROTO or DEV, but not both.
For example, if following the Custom approach, then the effort in the PROTO step is much more than if I were using COTS hardware. And, vice versa for the DEV step with COTS since there is a large effort to convert the functionality of the COTS hardware into custom hardware.
For the platform that starts with a COTS controller and as much pre-developed I/O hardware as possible, much if not all of this same hardware can be used in both PROTO and DEV steps. Consequently, I can choose to split the effort across those two categories, as illustrated in the bar chart. (Remember the sum of all the blue Hybrid bars totals 100%).
Finally, by way of comparison, experience shows that developing a Custom hardware solution from scratch takes something like 4X the time that is takes to combine pieces of pre-developed hardware modules from the Hybrid platform into a custom single board.
All these observations are illustrated in the bar chart which shows radically different bar lengths in PROTO and DEV for the three different approaches.
Interestingly, when following the Custom approach, the DEV step effort might be reduced relative to the Hybrid level. Why? Because all that hardware developed in the PROTO step would have been used exactly as is in the DEV step without any redesign, whereas the Hybrid approach would need to take the pre-developed I/O from each module and layout all that modular HW onto a single board.
CAVEAT: This benefit of Custom over Hybrid in the DEV step assumes no rework is needed on the Custom approach after the PROTO step is completed, a potentially unlikely scenario since so much information is discovered during the PROTO step. Rather, it is often the case that the DEV step with Custom is larger than the Hybrid case due to unexpected hardware redesign.
Even with the Custom approach, the blue bar for DEV would still not be zero length because the software created during the Prototype stage is not product-worthy, being temporary and somewhat hacked together to show functionality as quickly as possible.
In summary, the three scenarios considered are 1) Hybrid platform (COTS controller, pre-built custom I/O), 2) completely Custom, and 3) completely COTS. Then, the combination of time spent in the PROTO and DEV steps might be as shown in the table below.
| Scenario | PROTO | DEV | Total |
| All COTS | 23% | 100% | 123% |
| All Custom | 115% | 23% | 138% |
| Hybrid (COTS + Custom) | 23% | 31% | 54% |
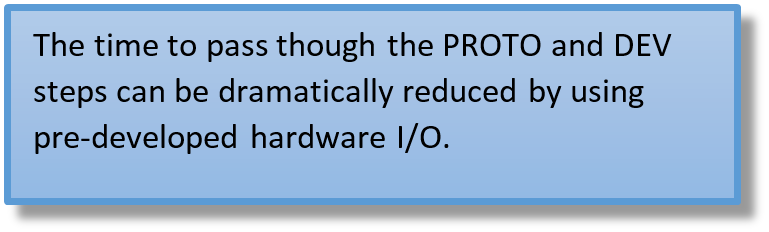
The key takeaway in this table is that you can save time (and cost) by passing thorough the Prototyping stage as quickly as possible by utilizing previously developed hardware. And, if that same hardware is also used for the Development stage, significant time (and money) is saved.
One downside of a Hybrid platform appears in the PROTO step. If the COTS controller and pre-developed hardware does not have the type of I/O needed for the PROTO step, then the COTS approach will certainly be best for PROTO since that platform likely has all the I/O you need.
Another way to describe the lesson in this table is that designing custom hardware takes effort and cost. When a hybrid COTS and pre-built I/O can be used both for prototyping and development, you win.
Note that these numbers don’t include any costs associated with the actual hardware, which would be substantially larger in the ‘All COTS’ scenario than the ‘All Custom’ scenario.
Debug and Beta
When the DEV step is done, the application is ready for debug and testing. No matter which approach you use in the COTS vs Custom spectrum, you will need debugging. Consequently, as shown in the bar chart above, I’ve given each of the 3 approaches roughly the same schedule, with a slight advantage to the approach that uses pre-developed hardware since there will likely be fewer last-minute tweaks to the hardware I/O. Check out some suggestions for debugging techniques.
After you’ve debugged the system, you should have various users try your system to see if they can break it. Good beta testers take pleasure in breaking your stuff.
In the end, there is just no way around this DEBUG step of debugging and beta testing and hence not much can be done to shorten the time.
Release
After the testing steps, you are ready to release the product to the manufacturer. This is the time to complete the configuration management of your system, such as labeling or tagging the version of your software, assuring that all the documentation (e.g., BOM and drawing package) is complete, before releasing your product to production.
At this REL step, the actual hardware platform selected does not affect the effort much, and I’ve given each of the 3 approaches the same time to complete.
As with the DEBUG step, not much can be done to reduce the amount of time on this step. If you’re interested in learning more about industrial embedded systems, check out our resources page.